


Stamp with the silhouette of a star to decorate pieces of polymer clay, clay, and soaps. With this star outline stamp, you can stamp the silhouette of a star to paint the inside later or simply leave the beautiful silhouette.
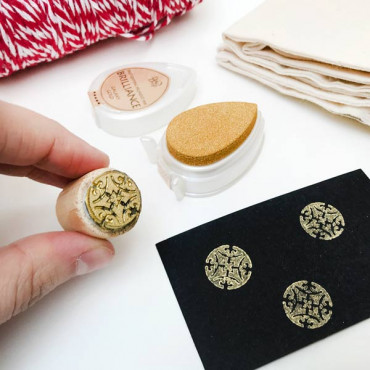
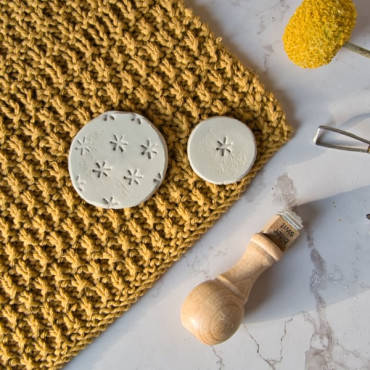
To make the DIY Christmas tree ornament you see in the photos, we used air-drying clay, this mini star-to-line stamp, a round cutter, Christmas twine, and a mini Brilliance Gold ink to decorate the sides of the ornament that you will find on our website. Since there is no need to bake the air-drying clay, we tried this pad and it looks great :)
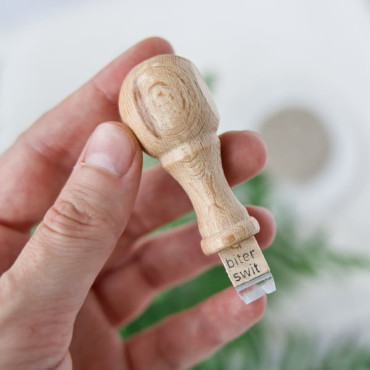
You can choose the size you want in the dropdown menu. The one shown in the pictures is the smallest size (0.9 cm / 0.35 inches approx.). Our stamps for ceramics are mounted on a wooden base with a handle to make them comfortable to use.
On our website, you will also find the solid version of the star, look at the related products at the end of this page.
Ceramic stamps are harder than normal paper stamps. This stamp is not suitable for use with ink but you can use it on ceramics, polymer clay, soaps, similar materials… Along with your order, you will receive the instructions.
CONTENT
- 1 texture clay and soap stamp Geometric Star Outline
* Stamp size in the photo: 0.9 cm / 0.35 inches
This stamp is not suitable for paper stamping with ink.
DETAILS
- Wooden base stamp
- Stamp size: To choose from the dropdown menu.
- Special hardness and depth
WHERE CAN I USE IT?
- In soaps
- In ceramics and clay
- In polymer clay
- Similar materials...
This stamp is made for marking your ceramic pieces, polymer clay, and cold process soaps.
It’s got just the right hardness and depth to press into your clay without losing detail. Just a heads-up: these stamps aren’t made for use with ink.
BITERSWIT GUIDE: USING & CARING FOR YOUR STAMPS
Here’s our Biterswit guide with tips on how to take care of your stamps and how to use them like a pro.
HOW TO STAMP ON CLAY – Little Tips & Tricks :)
- Super easy! Your clay is ready to stamp when it’s still soft and shapeable—not too dry. It should be soft or at a leather-hard stage so the stamp can sink in nicely. You’ll figure out the sweet spot with a bit of trial and error depending on your clay type, moisture, and room conditions.
- Avoid stamping on material that’s too hard—it could break your stamp.
- Try out different levels of pressure until you find what works best with your clay. Since the stamp is transparent, you can peek from the side to see how deep it’s going.
- Bigger stamps need more pressure, so it can help to support your piece from underneath with something like a metal base, your hand, fingers—whatever works to keep it steady. Big stamps are great for flat objects like plates, trays, coasters, or thicker-edged pieces. For delicate pieces, we recommend using smaller stamps since they need less pressure.
- If the stamp sticks to the clay, a light dusting of cornstarch on the surface can work wonders to keep it from sticking.
HOW TO STAMP – TIPS & TRICKS
- Your soap is ready to stamp when it’s firm enough to cut—usually around 24 hours after making it. This depends on humidity and temperature, so check when you can unmold it.
- Once unmolded, cut it into bars.
- Spray the soap with 96º alcohol before stamping. It prevents the stamp from sticking. We’ve tried spraying the stamp too, but spraying the soap gives better results (and it’s easier!).
- Try different pressure levels to find what works best for your soap’s consistency. If it’s too dry, you may need to press a bit harder. Since the stamp is transparent, you can look from the side to check how deep it’s going.
OTHER WAYS TO USE YOUR STAMP
Your stamp isn’t just for ceramics! You can also use it on:
- Cold process Soaps (When they are soft)
- Polymer clay
- White air-dry clay
- Cookie dough
- And other similar materials
HOW TO CLEAN YOUR STAMP
If your stamp’s getting a bit clogged with clay and your impressions aren’t as sharp as they used to be, it’s cleaning time! :)
Here’s a short video that shows you how (we hope it helps!).
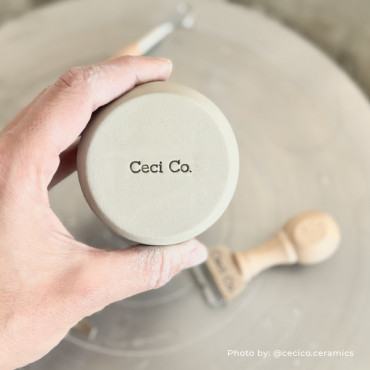
With this custom logo stamp for pottery and clay, you can personalize all your ceramic pieces with your brand image, name, or icon. With just a simple and easy action, your pieces will be marked and customized, ready to bake :) It's perfect for stamping soft and hard leather clay. You can choose the size that best fits your creations. Just remember, the...
Looking for a personal touch for your clay creations? This custom clay stamp with your name or text is perfect for adding a unique mark to your pottery, soaps, or polymer clay projects! Choose from 4 stylish font options that you can check out in the product photos. Whether you're a ceramic beginner or just don't have a logo, this stamp is a great way to...
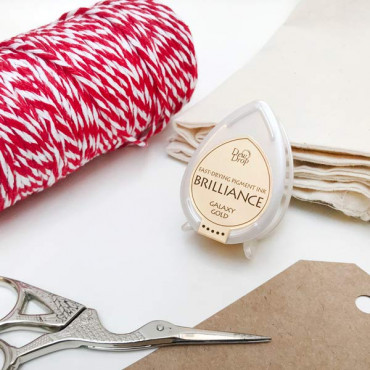
Add a celestial sparkle to your creative projects with the Brilliance Galaxy Gold Mini Ink Pad! This dreamy, drop-shaped ink pad is perfect for adding a rich, metallic gold shimmer to paper, cards, and more. Whether you're crafting custom wedding invitations, designing elegant Christmas cards, or giving your scrapbook pages a touch of glam, this compact...
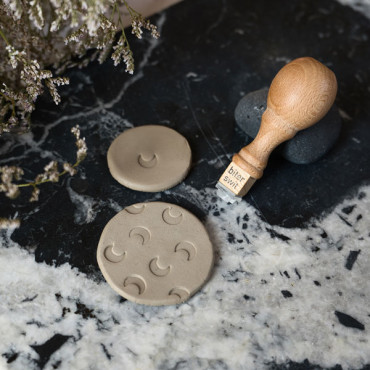
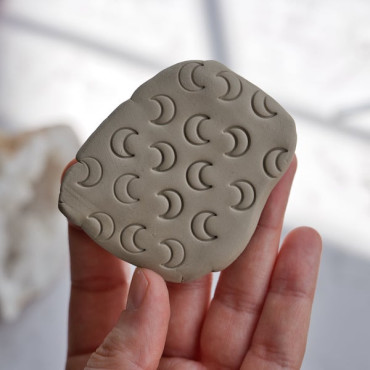
A moon silhouette clay stamp for pottery decoration, you can use it as a waxing crescent moon or a waning crescent moon. A versatile acrylic stamp perfect for decorating your pottery class creations. You can create a pattern on a plate for your jewelry, on a mug, breakfast bowl, or flower pot. It is also perfect for jewelry made of polymer clay. You can...
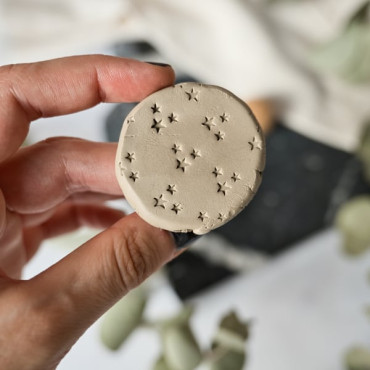

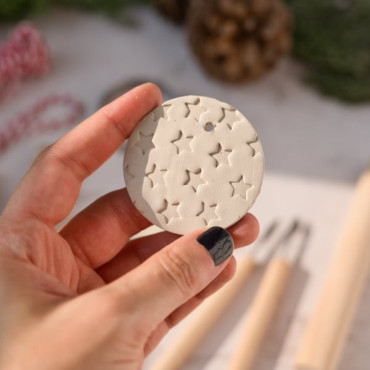
Star texture clay stamp to create a starry night pattern on ceramic pieces, clay, soaps... With this stamp to decorate ceramic pieces you can create star patterns on plates, cups, bowls, incense holders, candles, and everything you can think of. To create the stamping you only have to print on the stamp several times turning the stamp in each stamping, as...
Personalized stamp for ceramics and soap with the petals of a rose in the center and your text or name around it. It is perfect to sign the bottom of your vases or pots and also to mark handmade rose soaps. To personalize it you just have to write the text you want in the personalization section. On our website, you will find many models of predesigned...
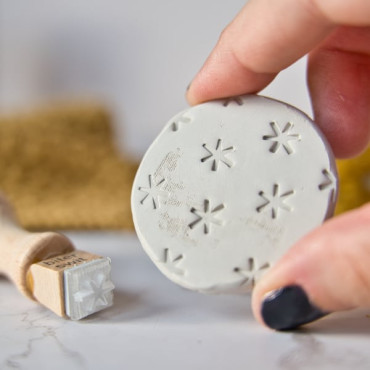
Acrylic texture clay stamp with an asterisk star to decorate ceramic pieces, polymer clay, and soaps. With this stamp to decorate ceramics you can create star patterns on cups, bowls, plates, vases, or flower pots. A simple but beautiful pattern :) Then you can paint the stamped star with the color of your choice and make each piece different. It is the...

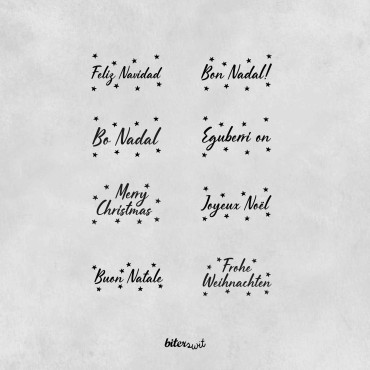
Spread the holiday cheer with our Merry Christmas stamp surrounded by stars and the festive message in a variety of languages! Simply select your preferred quote from the drop-down menu: Spanish (Feliz Navidad), Catalan (Bon Nadal), Galician (Bo Nadal), Basque (Eguberri on), English (Merry Christmas), French (Joyeux Noël), Italian (Buon Natale), or German...
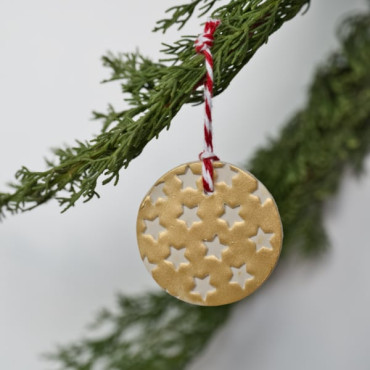
Stamp to decorate ceramics, polymer clay, and soaps in the shape of a star :) A basic design to have in your stamp collection for your ceramics classes. With it, you can create a star pattern on a mug, a clay medal, decorative plates, or a craft that we love: some DIY ornaments for your Christmas tree. To make the Christmas tree charm you see in the...
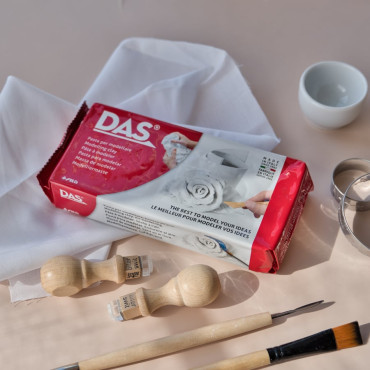
Looking for a versatile modeling paste to pair with your new ceramic stamps? DAS air-drying white modeling clay is the perfect choice! Whether you're a beginner or a seasoned crafter, this soft and squishy clay lets you create beautiful ceramic pieces right at home. Compared to regular clay (which is a little firmer), it has a fine texture and is very...