


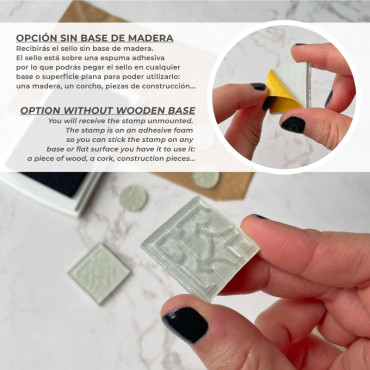
")
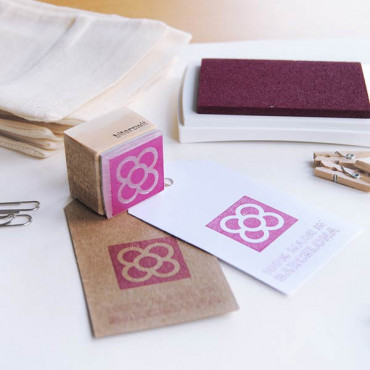
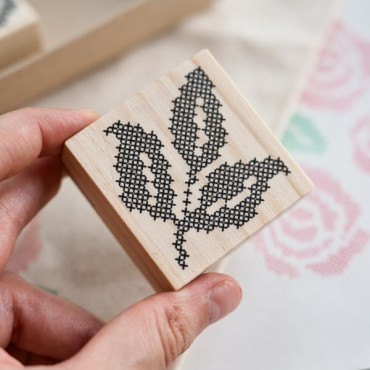
Ready to get crafty? This DIY cross-stitch rose and leaves stamp kit is the perfect way to create beautiful, handmade designs on a tote bag, tablecloth, napkins, linens, or even clothing! Whether you're hosting a special dinner or just want to add a personal touch to your accessories, this kit will spark creativity and fun!
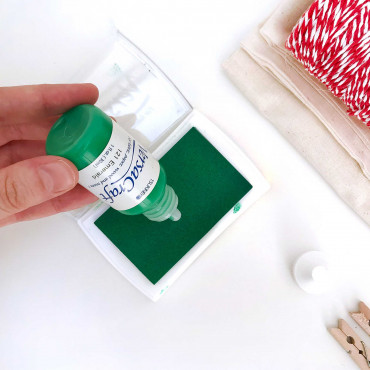
How to Use: It’s super simple to get started! Just ink the stamps and press them onto your fabric (or paper, wood – the choice is yours!). We recommend starting with a piece of paper to test your pattern before working on the fabric. The product photos include an example pattern, but feel free to create your own unique design!
Want to add a little extra texture to your creation? Embroider over the stamped design for a layered look that combines print and texture. You’ll get the bold color of the print in the background, with the added depth and beauty of thread embroidery on top. Plus, you can mix up the colors of your ink pads for a vibrant, multi-colored effect!
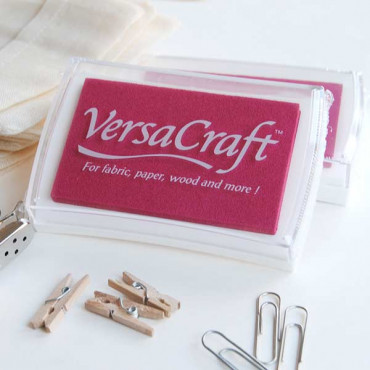
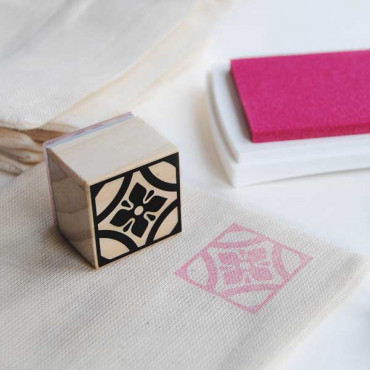
The pack includes 4 stamps in two different sizes and 2 VersaCraft mini ink pads for paper, fabric, and wood. In the +INFO section, you will see more details about the size of stamps and what is included in this DIY pack perfect for sewing and embroidery lovers.
VersaCraft inks are suitable for printing on natural fabrics, to make them last longer you only have to iron the fabric inside out when the stamping is dry and wash it delicately in cold water. They are not 100% permanent but we can assure you that they last a long time. If you want to use permanent inks we recommend Speedball, for example. You will be able to use these stamps anyway.
CONTENT
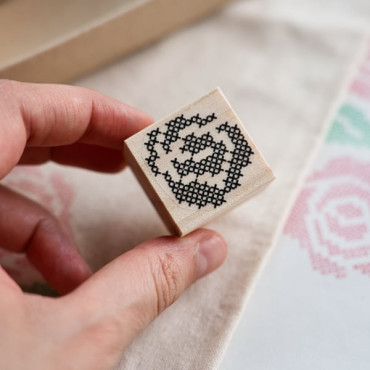
DIY Cross stitch stamp kit "Roses and Leaves"
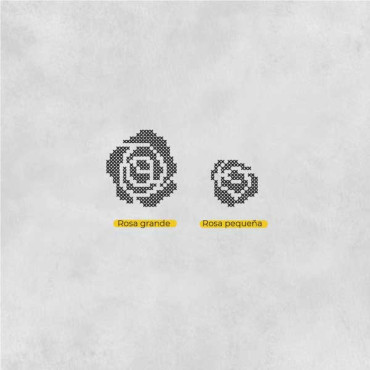
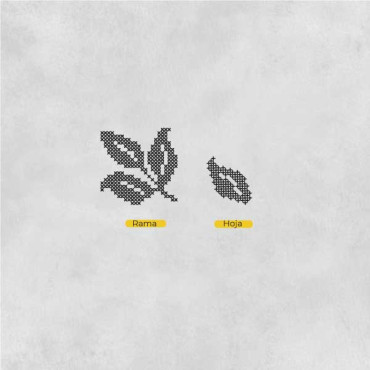
- 1 large cross-stitch Rose stamp
- 1 large cross-stitch Leaves stamp
- 1 small cross-stitch Rose stamp
- 1 small cross-stitch Leaf stamp
- 1 mini ink pad VersaCraft Poppy Red
- 1 mini ink pad VersaCraft Emerald Green
- 1 box to store the pack with the option: Stamps with wooden base
DETAILS
- Stamp print size large stamps: 4,5 cm (1.78 inches)
- Stamp print size for small stamps: 2.5 cm (1 inch)
- Material: Natural pine wood, rubber
Our wooden stamps are handcrafted and mounted on natural hand-sanded pine wood provided by local suppliers. Whenever possible we try to promote the small businesses around us.
The stamp is mounted on a rubber to make it easier for you to stamp it. You can also clean it gently with soapy water. Do not use corrosive materials and try not to touch the wood when you clean it.
In our Stamp Inks section, you’ll find a wide variety of ink colors for different surfaces (we specify the surface type in each product name). Each product includes detailed information and tips to help you get the most out of your ink. We hope this helps!
BITERSWIT GUIDE: STAMP USAGE & CARE
Here’s our Biterswit guide to help you take care of your stamps and inks. Enjoy! ?
HOW TO STAMP? Little tricks :)
1. Start with a little ink. No need to press too hard on the ink pad.
* Sometimes we tend to use too much ink, so it’s best to start with a little bit. Just tap the pad lightly until you get the right amount.
* The amount of ink you need can depend on the surface you're stamping: the more porous and rough the surface, the more ink you'll need.
2. Stamp on a flat surface. Don’t worry if the first impression isn’t perfect — it’s totally normal! New stamps need a little practice. Just have fun and keep testing until you get that perfect print!
WANT TO STAMP ON FABRIC?
If you’re stamping on fabric, go for natural fibers like cotton, linen, and silk. It works great! Just keep in mind that the ink isn’t 100% permanent, so with washing, it’ll fade a bit over time. To make it last longer, just iron the fabric after stamping to really set the ink.
If you want something more durable, we recommend Speedball inks.
STAMP CARE
* Clean your stamps when needed. If you’re using them often and the impressions start getting too ink-heavy, it’s time for a clean! Just don’t scrub too hard or use harsh chemicals.
* Oil-based ink. Inks like Encore are oil-based, and we recommend not overusing them on your stamps because it can damage the material. After using them, clean your stamp by stamping it on paper until it stops leaving marks, and use a cloth or wipe to get rid of any leftover ink. Remember! Never use water to clean stamps with oil-based ink. It reacts with the ink and makes everything sticky (trust us, we know from experience!).
* In addition to the Biterswit guide, we also have a short video where we explain how to store and clean your Biterswit stamps.
Large ink pad in a vivid fuchsia pink to print on non-glossy paper, clothing, or fabric made of natural fibers and wood. This VersaCraft Cherry Pink ink pad is perfect for decorating envelopes, creating your own DIY wrapping paper, stamping your logo on packaging, or marking the school clothes of the little ones of the house as well as books and...
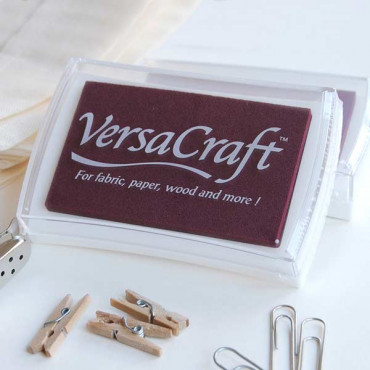
This VersaCraft Burgundy ink pad is a gorgeous, deep wine color that's ideal for fancy packaging or making a totally unique print on gift wrap. The burgundy or maroon color is closely connected with femininity and imagination, so if your brand responds to these values, do not hesitate to stamp your logo with this beautiful ink. And this ink is not just...
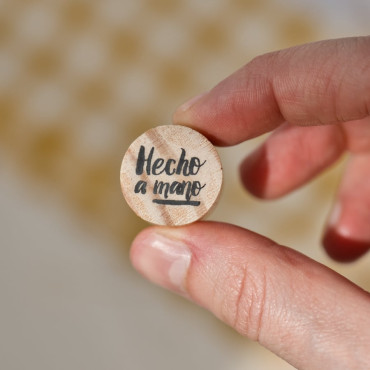
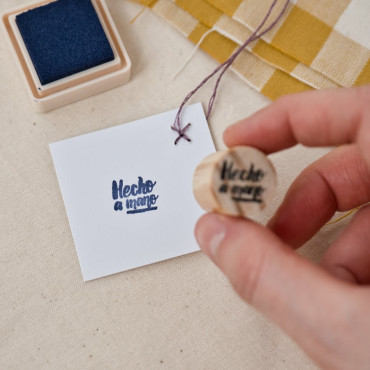
With this handmade rubber stamp you will be able to customize the labels of your gifts and products in no time and without having to order large quantities of printed labels that you may not like in 6 months. This Hecho a mano rubber stamp in Spanish is also available in Catalan and English so you can choose the language that best suits your brand. We...
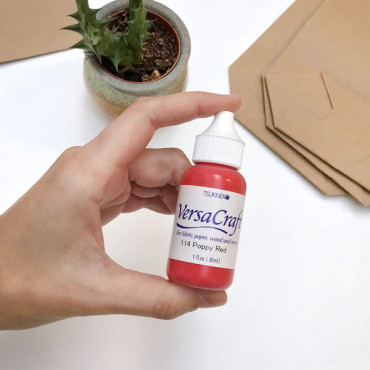

The Versacraft Poppy Red ink refill bottle is a high-quality, water-based ink that is perfect for use on a variety of surfaces, including paper, fabric, and wood. This ink is specially designed for use with stamping and other crafting projects, and it offers excellent coverage and vibrant color that is sure to make your projects stand out. Red ink is...
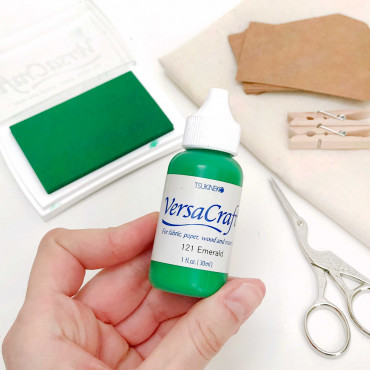
The Versacraft ink refill bottle in emerald green color is a high-quality ink that is perfect for use in a variety of crafting projects. Crafters can use this ink to create a variety of projects, including scrapbooking, card making, home decor, and more. Some ideas for crafts with this ink include fabric Printing. You can use the ink to print designs onto...
Cross-stitch rose rubber stamp perfect for creating patterns and DIY printings on fabric bags, toiletry bags, tablecloths, napkins, notebook covers, diaries, journals... You can choose the design you want in the dropdown where you can also see the size. Check the models in the product photos. In this product, you can find the rose stamps separately but...
Cross-stitch stamp of leaves and branches so you can create the cross-stitch composition you want on your tablecloth or tote bag. All our models have specific sizes to fit in any combination you make, that is, the cross stitch will always be the same size :) Select the model you want at the dropdown menu, there you can also find the print size of each...
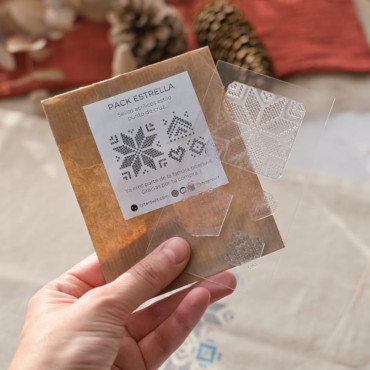
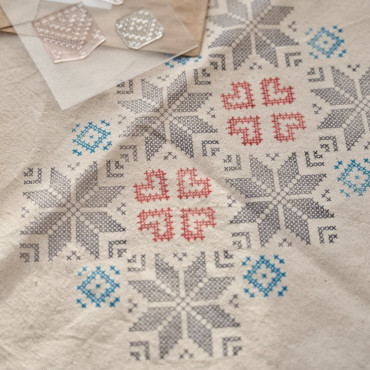
This festive Acrylic Christmas Cross-Stitch Star Stamp Pack includes 4 stamps in varying sizes, allowing you to create custom holiday designs on cotton bags, Christmas cards, tablecloths, tote bags, t-shirts, handkerchiefs, and more! Inspired by the classic ugly Christmas sweaters featuring cross-stitch patterns, this transparent stamp set lets you craft...