


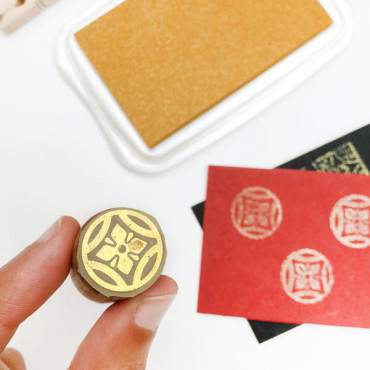
Holiday card-making just got a festive upgrade! This Snowflakes Mandala Stamp Set is perfect for adding a shimmering winter touch to your DIY Christmas projects. The set includes 3 intricate snowflake stamps and 3 metallic mini ink pads in galaxy gold, starlite silver, and cosmic copper—the perfect colors for a magical holiday glow. Stamp them on dark paper for a stunning contrast or layer them for a dazzling effect.
How can you create this beautiful DIY Christmas card? Very easy!
MATERIALS
- Glass and pencil
- Pack of Christmas snowflake stamps and inks
- Black card
STEP BY STEP
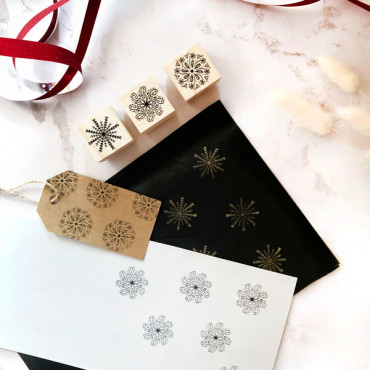
1. On a black card, use a glass to draw a circle that will guide your stamping. Turn the glass upside down and trace its circumference.
2. Stamp the first snowflake 4 or 5 times along the circle, leaving even spaces between them.
3. Stamp the second snowflake next to the previous ones.
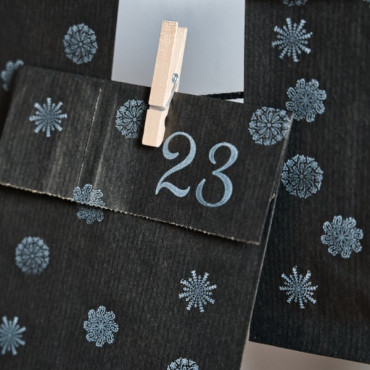
4. Fill in the remaining space with the third snowflake. This creates a beautiful overlapping effect, forming a festive wreath!
5. Let the ink dry, and your DIY Christmas card is ready!
Did you know that the largest snowflake ever recorded was 35 cm (15 inches) across? That’s almost the size of a dinner plate. Imagine how cool it would be to catch one that big!
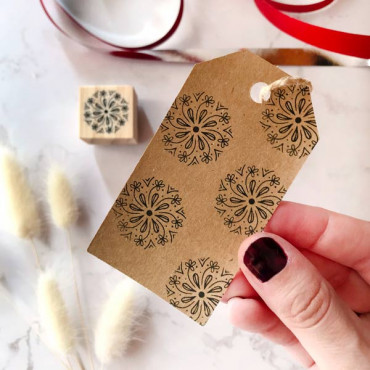
This stamp set isn’t just for cards—use it to create custom wrapping paper, festive gift tags, scrapbook pages, and handmade ornaments. Want an extra magical touch? Sprinkle glitter or embossing powder over the ink while it’s still wet for a luxurious holiday finish. Get creative and make your own snowy wonderland with these dazzling stamps!
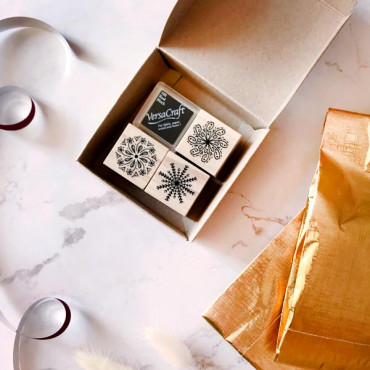
WHAT DOES THIS PRODUCT INCLUDE?
Holiday card-making stamp set Snowflakes Mandalas with:
- 1 rubber stamp Nordic Snowflake
- 1 rubber stamp Botanical Snowflake
- 1 rubber stamp Snowflake
- 1 mini gold ink pad. Brilliance Galaxy Gold.
- 1 mini silver ink pad. Brilliance Starlite Silver.
- 1 mini Copper ink pad. Brilliance cosmic Copper.
- 1 box to store the set.
* Optional: You can add black postcards and kraft envelopes at the dropdown menu.
DETAILS
- Stamp Size and details:
Print size 2,5 cm / 1 inch
Material: Natural pine wood, rubber
- Brilliance mini ink pads: 5x3,5 cm / 2x1.4 inches (drop shape). Suitable for paper
- Black postcards: A6 size (10,5x14,8 cm / 4.1x5.8 inches). 185gr.
- Kraft envelopes: B6 size (12,5x17,6 cm / 4.9x6.9 inches)
Our wooden stamps are handcrafted and mounted on natural hand-sanded pine wood provided by local suppliers. Whenever possible we try to promote the small businesses around us.
The stamp is mounted on a rubber to make it easier for you to stamp it. You can also clean it gently with soapy water. Do not use corrosive materials and try not to touch the wood when you clean it.
In our Stamp Inks section, you’ll find a wide variety of ink colors for different surfaces (we specify the surface type in each product name). Each product includes detailed information and tips to help you get the most out of your ink. We hope this helps!
BITERSWIT GUIDE: STAMP USAGE & CARE
Here’s our Biterswit guide to help you take care of your stamps and inks. Enjoy! ?
HOW TO STAMP? Little tricks :)
1. Start with a little ink. No need to press too hard on the ink pad.
* Sometimes we tend to use too much ink, so it’s best to start with a little bit. Just tap the pad lightly until you get the right amount.
* The amount of ink you need can depend on the surface you're stamping: the more porous and rough the surface, the more ink you'll need.
2. Stamp on a flat surface. Don’t worry if the first impression isn’t perfect — it’s totally normal! New stamps need a little practice. Just have fun and keep testing until you get that perfect print!
WANT TO STAMP ON FABRIC?
If you’re stamping on fabric, go for natural fibers like cotton, linen, and silk. It works great! Just keep in mind that the ink isn’t 100% permanent, so with washing, it’ll fade a bit over time. To make it last longer, just iron the fabric after stamping to really set the ink.
If you want something more durable, we recommend Speedball inks.
STAMP CARE
* Clean your stamps when needed. If you’re using them often and the impressions start getting too ink-heavy, it’s time for a clean! Just don’t scrub too hard or use harsh chemicals.
* Oil-based ink. Inks like Encore are oil-based, and we recommend not overusing them on your stamps because it can damage the material. After using them, clean your stamp by stamping it on paper until it stops leaving marks, and use a cloth or wipe to get rid of any leftover ink. Remember! Never use water to clean stamps with oil-based ink. It reacts with the ink and makes everything sticky (trust us, we know from experience!).
* In addition to the Biterswit guide, we also have a short video where we explain how to store and clean your Biterswit stamps.
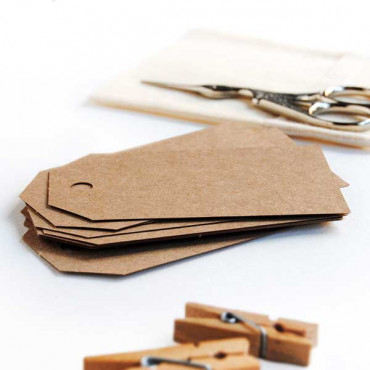
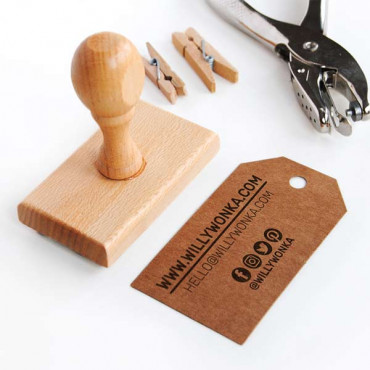
Pack of 25 brown kraft cardboard labels to make your DIY business cards, labels for your handmade products, hang on your wedding gifts or to decorate Christmas and birthday gifts. These brown kraft labels are the perfect way to complete any project! With 25 units in each pack, you'll have plenty of labels to create a professional, cohesive look. The brown...
You can decorate the most Christmassy pages of your journal with this mini snowflake icon stamp making a border around the page, or mark vacation days with a snowflake... This mini stamp will help you organize your agenda or calendar and due to its mini size, it will adapt to any small space you want to decorate as well as be very easy to store it :) You...
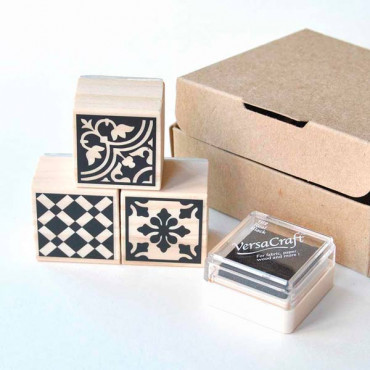
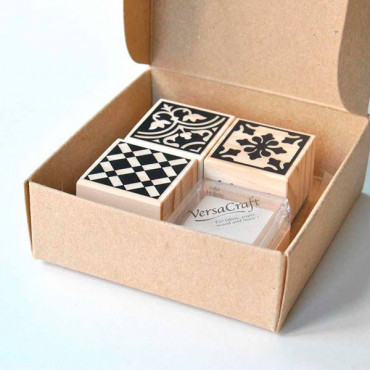
If you are looking for an original way to decorate your scrapbook album or your Memory Planner or want an original gift for your mother who loves crafts and modernist art, this pack of 3 stamps with the hydraulic mosaic tiles of Barcelona is what you are looking for. A complete DIY stamp kit that includes a mini VersaCraft ink in the color of your choice...
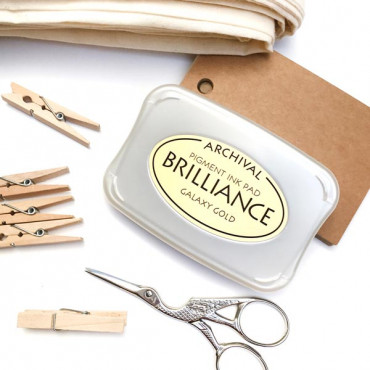
Add a touch of elegance to your scrapbooking, card making, or any paper craft project with the Brilliance Galaxy Gold Stamp Pad. This beautiful ink pad delivers a rich, metallic gold finish that’s perfect for creating stunning designs. Whether you're stamping on white, black, or colored cardstock, the soft, vibrant gold ink creates a smooth, shimmering...
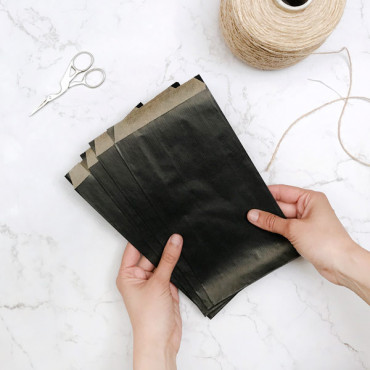
Add a touch of sophistication to your stationery collection with our Pack of 25 Black Laid Envelopes with Gusset! Sized at 12x24 cm (4.7x9.4 inches), these envelopes are designed with a gusset that expands up to 5 cm / 2 inches, offering plenty of space for your cards, invitations, or small gifts. The inside of each envelope is lined with natural kraft,...
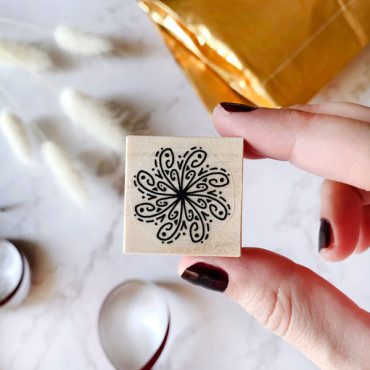
This Mandala rubber stamp features a stunning Nordic snowflake design, perfect for adding a touch of winter magic to your DIY projects. Whether you're decorating Christmas wrapping paper, stamping a timeless print on a notebook cover, or creating a Nordic-style background for scrapbooking, this stamp will help you create something truly special. We’ve...
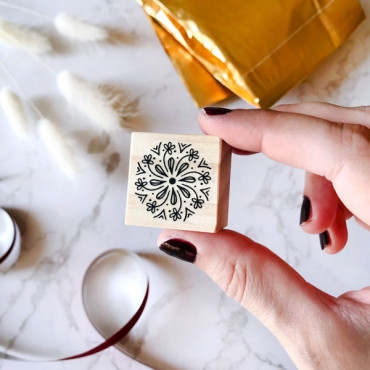
Looking for a stamp that’s both festive and versatile? Meet our Mandala Botanical Snowflake Rubber Stamp—a dreamy blend of delicate snowflakes and mandala-inspired geometry. It’s part of our snowflake stamp collection, designed to bring an artistic touch to your DIY crafts, gift wrapping, and creative projects. The best part? While it’s perfect for...
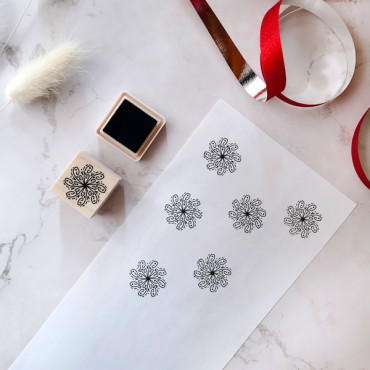
Looking to add a magical winter touch to your crafts? This Three Snowflake Mandala Rubber Stamp Set is perfect for DIY wrapping paper, holiday cards, gift tags, and so much more! With three unique snowflake-inspired mandala designs, you can create beautiful prints that work for Christmas and beyond. What’s inside the pack?1 Nordic Snowflake Rubber Stamp1...
It's here, it's finally here! Mariah is peeking out—or rather, she's coming in fast like a lightning bolt. Christmas has landed, and with it, we’re bringing you this Floral Christmas Holiday card-making stamp set to give your holiday creations a special touch :) This DIY Christmas kit lets you handcraft your own stamped Christmas postcards. It includes...